
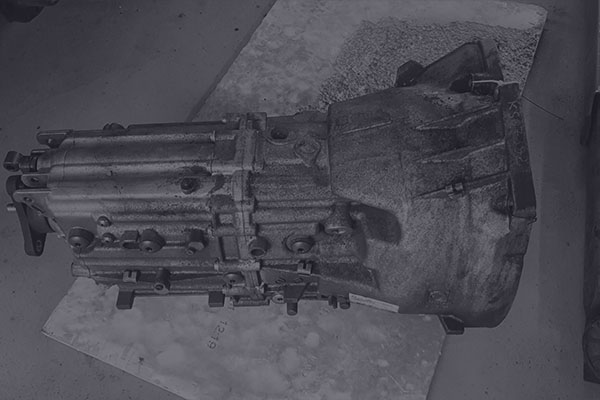
So, here you are, looking for answers for your questions! I was on the same lane one year ago, trying to figure out how to crack open this BMW ZF GS6-53DZ gearbox. The real problem is that there is literally no proper tutorial out there in internet, how to do it properly. No worries, I will try to do a proper writeup based on over year collected information, my experience & some extra info by ZF factory itself!

So, whatever is the reason, replacement of bearings or welding the bellhousing like I did, you must open it up to do it properly. It would be also nice to change the bearings while you are at it. Let’s begin!
Probably there is some extra tools what you will need while on it… this is the basic list what came in my head first:
- Torx 30, 45 & 50
- Ratchet
- Extension for ratchet
- Torque wrench (20 Nm)
- Straight nose lock ring pliers for inner & outer rings
- …..
- Socket (sadly can’t remember was it 17 or 18)
- Heat gun
- Grinder
- Infrared thermometer would be useful to monitor bearing temperature
- Shaft seal remover
- Flat end screwdriver
- Tools to build a puller for housing or it is also possible to remove housing via preheating the bearings! It is a best option if you can heat bearing up to 110 Celsius, in this case housing will come off with slight tapping on input shaft)
List of spares:
- Sealing cap with original ZF spare number 0501 317 873* as shown on Diagram No.1 with number 01.130 (price aprox 8 euros)
- Shaft seal with original ZF spare number 0750 111 403* as shown on Diagram No.1 with number 01.030 (price aprox 10 euros)
- Ang. Cont. Bearing with original spare number 0735 340 180* as shown on Diagram No.1 with number 01.100 (price aprox 60 euros)
- Ball bearing with NTN code 6308X35CS26 (you can find this roller bearing from any decent bearing dealership for 25 euros aprox. On diagram marked as 01.070.)
- Some liquid gasket (Victor Reinz is one of the best out there with price tag aprox 10 euros)
- Oil BMW MTF-LT-2 1.6 liters.

NOTE!
Spare parts with * after number would be best & cheapest to order directly from ZF factory! Just contact with local ZF dealership & they will hook u up! Ball bearing can be found at any decent local bearing shop! You don’t have to stick with SKF ball bearing but, in my opinion, it is best to go for premium if you have higher torque engine build in your hand!
So, let’s begin with disassembly! First thing first I assume that oil is still inside the gearbox so begin with removing plug 01.230 & drain it in clear oil pan or something similar (it is always good to check old oil for metal ships etc. to get some idea from gearbox condition). Remove bolts 01.050 with guide tube 01.040. Seals 01.030 & 01.130 will be changed anyway (I just don’t see any option to take them out without destroying them) so take a flat end screwdriver and hit it inside seal to make some prying hole for shaft seal puller, you can also drill the hole but be careful not to damage bearing seals!
After successfully removing both seals, you will need to remove bolt hidden below seal 01.130 with retaining ring 01.120. Same goes with input shaft expect there won’t be any bolt and only retaining ring.
Now, when bellhousing end is cleared there are some extra bolt’s & bits on side what need to be removed next:


It’s a easy task to remove 06.060 and 06.480 (below 480 there will be spring with detent pin also hidden), just screw them out & that’s it. To deal with 06.830 & 06.780 I will strongly recommend to clean those surfaces with brake cleaner or something similar before. After that remove retaining rings on both. If there is no dirt on the way there’s a possibility that sealing caps will just pop out thanks to spring force. If not then take 2 small screwdrivers and try to pry them out gently. Springs with pins should come out easily afterwards.
And now the final bolts before fun begins. On Diagram No.1 they are indicated as 01.220. Those are aluminum bolt’s so be 100 precent sure that torx bit will fit nice & snug in this socket, cleaning wont do any harm! After 15 bolts has been removed we are finally ready to split the casing!
So, like mentioned previously there are two ways to split this casing. If you are planning to build a puller keep in mind that it have to be quite bulky to keep up with forces. Both input & aux shaft are fixed to shaft via tolerance fitting so in normal condition there is no way you can just pull it off from shaft. Same thing goes with clearance between housing and bearing. Because there is two shafts you have to use 2 pushing points on puller to equalize the forces as indicated on diagram No.3!

There are some topic’s out there where guys just pull it off brutally via input shaft but I strongly advice you not to do it to avoid any possible damage to the housing, bearings & and list goes on. That’s the puller what I used, beams where bolted to the housing and 2 bolts in center where use to push on shafts:

Always protect the shaft ends by adding washer or something similar under the bolt tip!
There is also possibility to split it gently but it requires a lot more patience . Idea is to heat up bearing inner ring so it will expand enough to clear clamping force on shaft, revers via how those things are installed. In this case it would be perfect to have 2 heat guns on your hand to heat those bearings simultaneously & laser thermometer to keep eye on temperatures. If you are planning to install new bearing anyway you can go over 120 °C with no problem- in this case grease just starts to melt out and seal can be damaged, nothing else. If you still want to use those bearings later just don’t go over 120 °C and try to direct airflow straight on both bearing inner rings regularly measuring it’s temperature. After achieving 120 °C on both rings try to fix bellhousing somewhere (I was just holding it between my legs on ground) and hit the shaft end with hammer holding some wooden block at tip of shaft end to protect it from hits. If everything done properly housing should come off relatively easily.
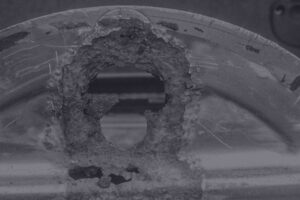
Both bearings should stay inside bellhousing after separation so if you are planning to change those like I did remove the bolts 01.090 with fixing plate 01.080 and tap them out as shown on Diagram No.4. There will be small issue with bearing 01.100- Because it is angular contact ball bearing then inner ring is made from 2 parts. One part will be left behind (as seen on picture No.5) on aux shaft and will require some heating or grinder to get it off. Grinder is a good quick way to do it but everything has to be covered up to avoid metal dust accumulation inside the gearbox and it requires precision not to damage shaft it self. You don’t have to grind it all way trough- you will only need one groove, hammer and chisel to hit a crack inside this ring. After that it can be removed easily. Other option includes heating again and should work fine in theory but I haven’t put it in practice.


So, now you are here thinking how to put it back together. Let’s assume that you are planning to replace bearings in process. There is a specific order how to make it happen.

As shown in diagram No.5 install bearing 01.070 by tapping it in to the casing. Secure it on place using locking plate with bolts.
Take Bearing 01.100 one inner ring, heat it up to 120 °C, put some oil on aux shaft end and slip the ring on shaft like shown on picture No.5.
Tap the bearing 01.100 into casing. Bearing in place remove other inner ring from bearing- it will be installed after gearbox casings are back together.
One tip before you install the bellhousing- check & clean magnet next to drain plug before you install it.
Now the fun part will begin!
Putting casings back together is not an easy task- took me several attempts until I got it right. Gear shifting shaft must be in correct place so that bearings inside casing would accept shaft ends & shifter itself would work properly later. It would be very nice if you can heat up whole casing with bearings installed in place up to 120 °C. (wait until you wife goes to work & use electric oven in kitchen but make sure casing is clean from oil & dirt, otherwise you won’t survive when she comes back home :D! NB! This is not good advice, but it would work!)
Don’t forget to clean casing ends from old sealant & apply new sealant before installing it back on place! With heating or without the principle is same: make sure that fork ends would fit right into the rollers as shown in Diagram No.6. Also, it is important to align up locking bracket 06.170 with pin on fork 06.050 & make sure lever on fork 06.300 would fit into the gap on fork 06.050 as indicated on Diagram No.6.

If you didn’t heated the casing would have to press it back together. Casings back together install bolts aluminum bolts 01.220 as shown on Diagram No.1. Make sure that threads are clean and in good order, it is very easy to damage those bolts! Max toque spec for those bolts is 20 Nm! Some may say that bolts have to be changed after removal but there is no requirement from factory itself!
Casing back on install bearing 01.100 inner ring on place via bolt & everything else can be installed back together in reverse order as described at beginning. Make sure all gears engage with ease, fill the gearbox with new oil and you are good to go! NB! Drain and fill plug toque specs for M12x1,5 plug is 25 Nm and M18x1.5 35 Nm.
Special thanks for readers and don’t forget to leave comments down below! I’m also grateful if point out any mistake in this tutorial! Pictures are taken from ZF spare parts catalogue. Please contact me via kasutamucustoms@gmail.com if you want me to share it with you!
Great write up, thank you for sharing this. I was curious about how to open this up also. Do you have a picture of the inside view of the bell housing half of the case? It sounds like the ideal way to seperate the bell housing is to use a beam and a bolt and use that to press it off the input shaft nose. It sounds like the case halfs are sealed with liquid gasket, no rubber or paper material, would you mind providing the part or description of the Victor Reinz sealant?
What was the reason you had to open it up? replacement of synrchos, bearings, or other parts?
Hi! Thank you for your comment!
Sadly didn’t find any picture from the phone.
For pressing you can use beam but it have to tolerate quite much sideway force and you need to press from 2 points equally- under input shaft there is another shaft nose what is hidden below sealing cap.
If I remember correct than originally there was a gasket from factory but you will be golden with liquid gasket like Victor Reinz sealant or something similar.
The reason why I had to split casing was that gearbox was bolted on Volvo t6 engine and bellhousing had to be welded. You can see some of this progress in my Instagram page: https://www.instagram.com/kasutamu_customs/
Hello you are like my savoir! I’m recently working on rebuilding my GS6-53BZ, may I ask where can I get parts no. 06.160 & 06.120(I assume they are the same?) And if you know the name of the parts in English please tell me also, I live in a country where most of BMWs are automatic haha, sorry for my armature English, look forward for your reply! Thanks
Hi!
Those parts are called “stop bush” in English. Best bet to find one is to source out who is your local Zf dealership in you country- for instance in Estonia it is https://kgk.ee/ . They can ask straight from factory.
Pretty happy I stumbled on your website. Any idea what the 06.080 part number is and how it can be replaced ? It seems like it is pressed in from the exterior of the gearbox ? I have one that has cracked so the spring it contain has popped out and it’s a real head scratcher.
Hi!
Thank you for your comment
You are probably correct- this stop bush is probably pressed into casing of gearbox from outside. I’m not sure how tightly it sits there but you can try to drill out center and then slowly pry out with small screwdriver or something similar.
I will try to send spare parts catalogue via email- there you can check for spare part number and try your luck!
Today i have ordered bearings 01.070 and 01.100 and another parts (sealing cap, oil, sealing ring, …). My transmission makes some noise when clutch pedal is not pressed. when i press clutch pedal to the floor, the rattle sound sudenly stop – probably these bearings. In our state is problem to order these bearings, so i have asked directly NTN. they offer BA2-0023B
35 x 73 x 30 and 6308LLUC3/5K NTN 40 x 90 x 23. They Told me that somebody ordered these bearings exatly for this transmission and it works, so i have ordered these bearing (i know that these bearings aro not directly from ZF, but when it will work, it will be great). Of course, thanks for your legendary write up.
Hi!
Thank you for your comment!
NTN should work just fine.
Glad to hear I can help!
Let me know how it went when the job is done.
Hi, I have the 53DZ gearbox connected to a 71 Ford Mustang 429 making 650hp/750Nm via a Tilton 3 disc rigid clutch. I I noticed that “SNX” wrote that the gearbox makes noise and it disappears when pressing the clutch – the same in my case. The guys driving drifting have experienced the same with a rigid clutch like Tilton 3 disc NASCAR clutch. The noise disappears also when rising up the rpm. I was told by a ZF mechanic that most probably the resonance is coming from the engine itself. The gear shifts as such are clean. In my Mustang the rear axle is rigid and the propeller shaft has an inch gliding action to compensate the suspension movements. The connection to the gearbox is otherwise rigid.
Not knowing how BMW has solved this but it not necessarily is a bearing problem. It would be interesting to hear what “SNX” found out and did he get rid of the resonance in the gearbox.
Sorry for late reply!
Sadly I have no feedback from SNX but it seems to be the deal when u are running rigid setup- vibration and noise have to go somewhere.
Om 606 and bmw gearbox gs6
Same shit, sputtering at idle
Hi Martin,
Thanks so much for your write up with photos and schematics. Really good stuff as I was googling for a while without getting the answers to my question.
Yesterday I was changing the oil on my GS6-53DZ for the first time, and stupidly removed 06.060 instead of the filler cap. I wasn’t paying enough attention. I had to get creative tool-wise to get access to it as well as it’s so close to the trans tunnel in my E88 135i. I don’t have a low profile T50 but used a ratcheting spanner on the shaft of the T50 to crack it and then was able to remove it by hand. I was shocked when I pulled out the pin and realised it wasn’t a plug, but had a tapered shaft with a point on the end. I then felt around and found the correct filler plug and realised how dumb I’d been.
Anyway, I cannot reinsert 06.060 by hand and was hoping I hadn’t messed something up inside the box. Looking at your photos and diagrams I’m thinking I just need to reinstall 06.060 with a low profile tool and I should be ok right? I’m guess the pointed and tapered end of the bolt will correctly locate into the shift fork?
Do you know what torque it needs to be?
Hi!
Thank you for your comment!
Happens to the best!
I believe it’s not so huge problem- there is slight play on the gear lift fork but nothing criminal when one bearing pin is removed. Small wiggle should guide it back to it’s position.
Sadly can’t tell about specific toque specs for that one but if you will measure the thread you can find necessary information from google.
Transmission make some noise when clutch pedal is not pressed the proplem is the bearing 01.070 seal two side 2rs it gets dry then make noise should be 1rs or remove 1 seal inside thé Transmission side the oil Will lubriquateth bearing
You can try to repack the bearing with grease if there is enough room to remove bearing plastic shield
Hi There! Thank you so much for this post…there is not much info out there about the inner workings of this transmission and how to take apart and rebuild. I’m hoping someone can help point me in the right direction here…in draining the transmission fluid from my GS6-53BZ (hopefully it’s similar enough), I found a small snap ring attached to the magnetic drain plug and I’m trying to figure out what part it is before trying to fix myself or find a shop to help. The trans is out of the car but was working well with no noise or issues before removal and i can cycle the gear selector through all gears with no issues now. The OD of the snap ring is 11.89mm and the ID is 9.25mm, smaller than part 06.780. Maybe parts 06.224, 06.184, 06.194, or 06.234 in the diagram above? Thanks so much!!
Hi!
If I’m correct the only difference bedween 53DZ and 53BZ are gear ratios.
Drain plug should not contain any snap ring- part number 01.230 on first scematic.
Part 06.224 should be o-ring installed on quide pin 06.220.
Mabey you can send me a picture about this ring and I will let you knw what I think: kasutamucustoms@gmail.com
Thank you for the quick reply, Martin! I have emailed you a photo. And yes, no snap ring from the drain plug, the snap ring was stuck to the drain plug because I use aftermarket magnetic drain plugs – ironically for this exact reason. I just hoped I’d never find anything on it and thankful I have it or else the snap ring would have just drained right into my drain pan and likely never would have seen/noticed it.
Hello, I’m looking for part 01.250, the roller bearing. I haven’t been able to find it yet.
Could you please give me the reference number for this part? Because it has unusual measurements and must only be sold by ZF, but I can’t manage to contact them, and there are no dealers near me.
It would be a great help if you could provide me with the reference number.
Thanks in advance.
Hi!
Reference number for this one is 0735 298 189
I hope it helps!
I will send catalogue also to your mail!
Bst Rgrds
Ammer
I see lots of complains where people have noise at idle, which disappears when clutch pedal is pressed or when driving. I had the same issue and turned out to be the reverse idler bearing
Hello everyone,
Does anyone have the complete workshop manual for the official ZF? I hear a clanking noise when I release the clutch. It sounds different depending on the release conditions or only if I accelerate under certain conditions. It’s like a “stenk” as if pieces of metal were moving. The dual-mass flywheel was half-marked, and I hope that’s it. The two parts were rubbing because half the flywheel had a long-marked half-flywheel mark. But the gearbox has 430,000 km, and I’d like to open it to check the status. Gearbox GS6-53DZ on Bmw E60 530D.
Hi
There is no workshop manual for this box. This was confirmed by ZF factory in Germany who said that this box is so called maintenance free and due to this there is no workshop manual. But they where kind enough to send me spare parts catalogue- I ill send it to your mail.
Flywheel is probable cause to the clank I believe. You can also change oil of the box and see if there is any metal shavings etc. – if none I don’t believe that there is anything wrong with box itself…